How to photograph archaeological artefacts
A photograph of an artefact is most useful to research when it can be laid beside another photograph — of another object, taken somewhere else, years later — and the two can be compared without either one misleading. That asks for the same things every time: the same light, the same ground, a known colour and a known scale. This guide goes through them in the order you meet them at the camera. The reasons behind each step are under Principles & Setup; what the result is measured against is under PHOTARCH's levels.
What you need
- A camera that photographs raw. No particular camera, sensor size or resolution is required: the grade each photograph receives says what it is fit for. A lens with low distortion — a prime or a macro lens — makes a good grade easier to reach. Even a phone camera will do, if it can save raw files.
- A stand that holds the camera square above the object — a repro stand, or a tripod with a column that can point straight down.
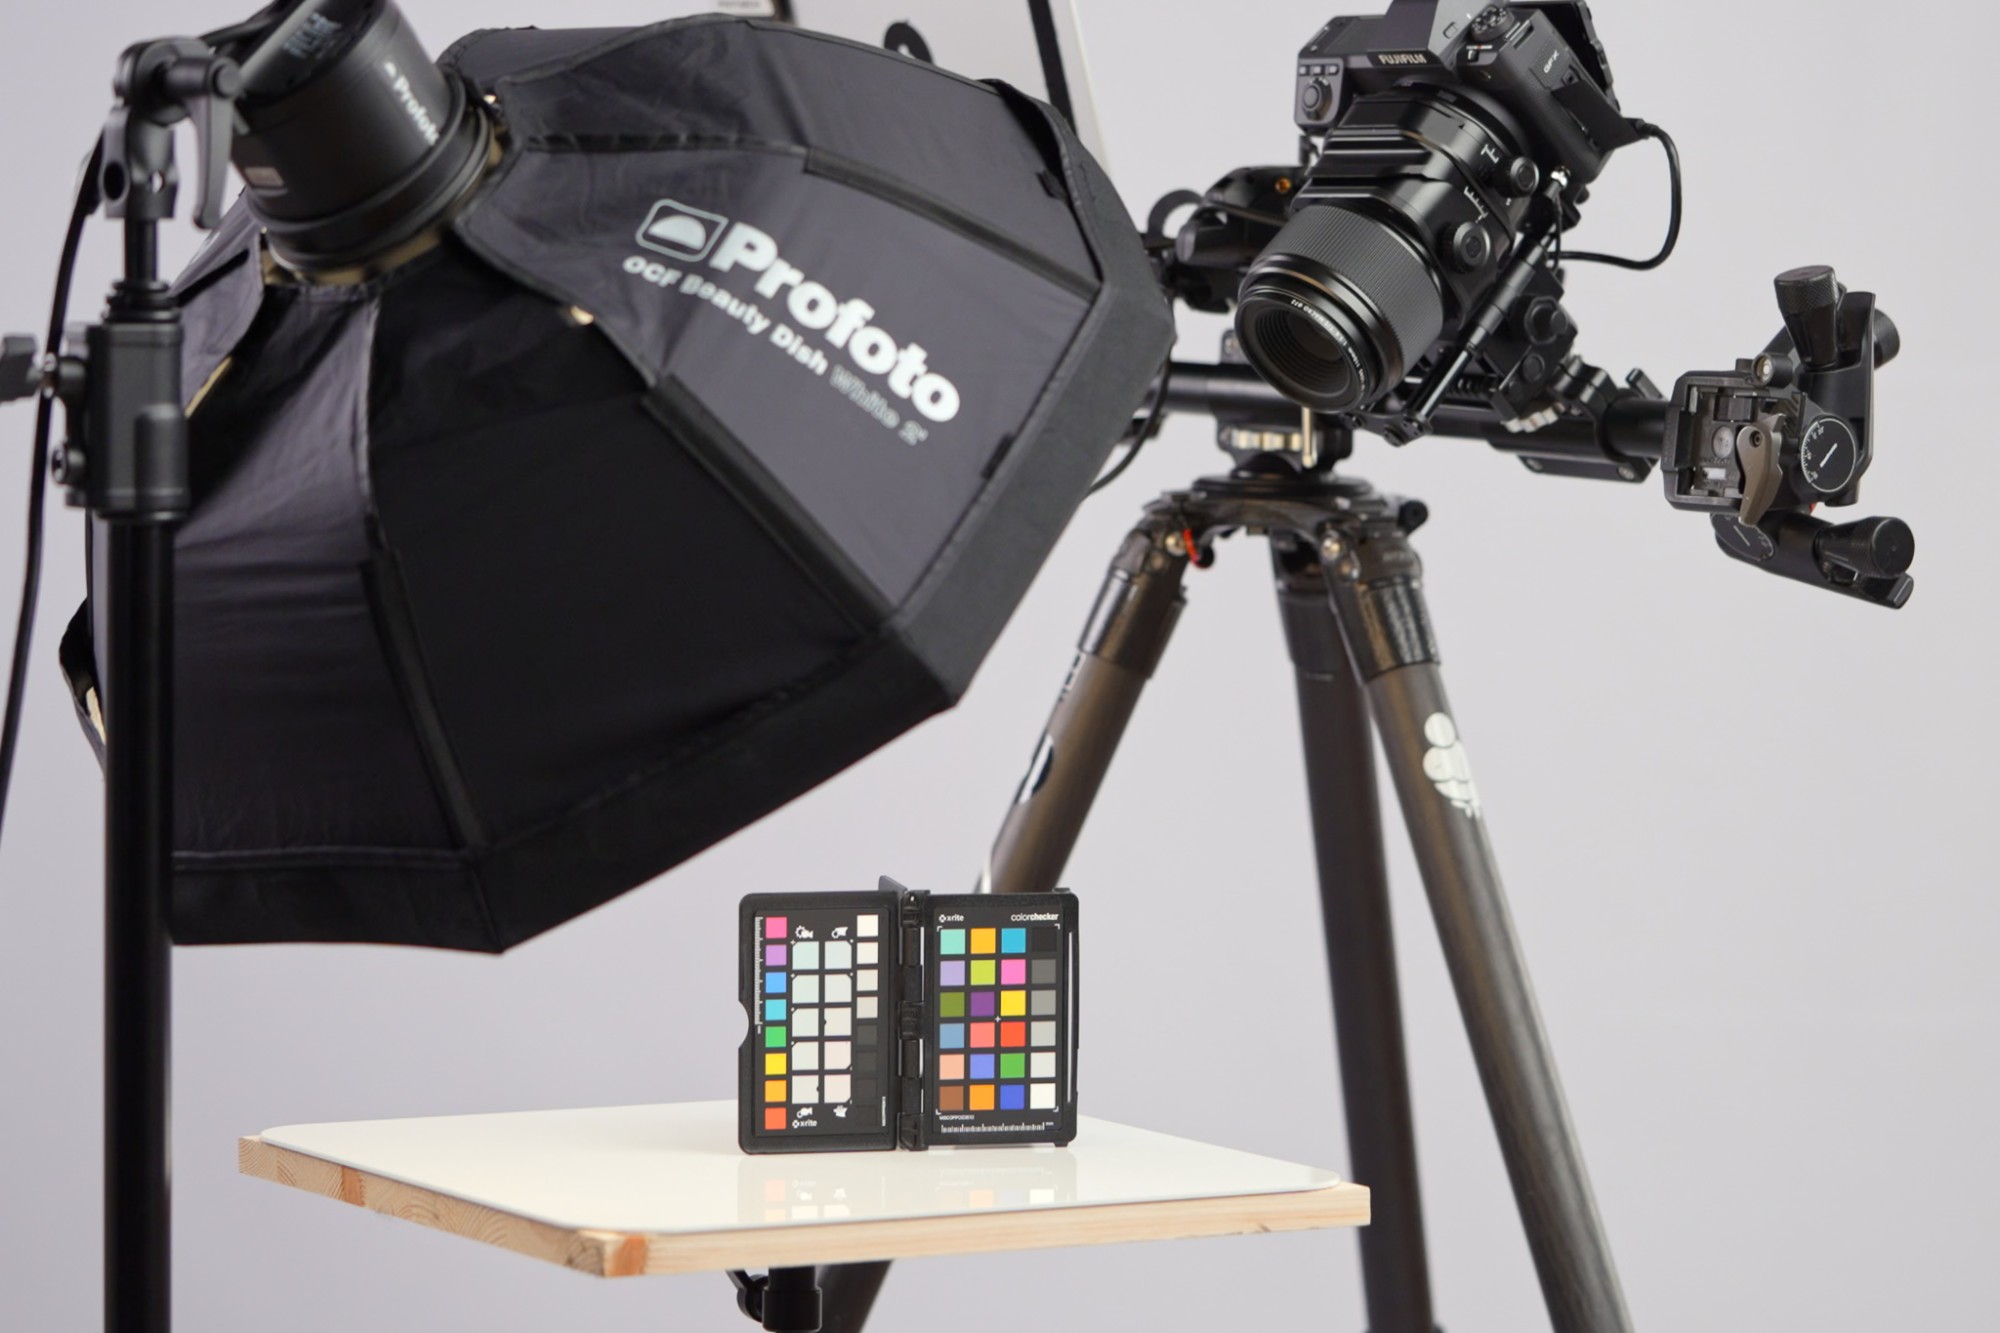
- One key light with a direction: an LED panel at the least; a high-CRI LED or a strobe with a modifier for the best result. Opposite it a fill light: a white card, or a second lamp clearly weaker than the key light.
- A white ground. Best is the PHOTARCH board, a white surface with markers in its corners from which the scale is read; the PHOTARCH app prints the markers, so a board can also be made. Without a board, a sheet of glossy or semi-gloss white card — not matt, whose texture shows in the shadow — and a digital caliper.
- A ColorChecker (Calibrite, formerly X-Rite). The Classic is enough to follow the method.
- A digital caliper.
- Latex or nitrile gloves. Not cotton: cotton gloves shed fibres, and a single fibre on the object shows at once in a detailed picture.
- CAMERA ON A STAND — photographs raw, held plumb above
- ONE LIGHT, ONE CARD — a light with a direction; a white card opposite
- PHOTARCH BOARD — a marker in each corner
- COLORCHECKER — Classic, 24 patches
- DIGITAL CALIPER — the scale without a board
1. Set the light, once
Place the light at half past ten, at a 45° angle to the object: if the object lies at the centre of a clock face, the light stands at 10:30 and the shadow falls toward 4:30. Put the white card or the weak fill opposite, so the shadow is softened but not removed.
From now on the light does not move. Between pictures the camera moves to each view, never the lamp, so that the same view of two objects is lit the same way — in this studio and in every other that follows the method. The light has a direction on purpose; why is under Direction, not evenness.
- KEY LIGHT — 10:30 · 45° above
- CAMERA — on a copy stand, plumb above
- FILL LIGHT — at 4:30, opposite the key
- CAST SHADOW — toward 4:30
- PHOTARCH BOARD — a marker in each corner
2. Lay the object on the ground
Put on the gloves. Lay the object on the board, inside its markers, or on the white ground, with the side to be photographed facing up. Let it cast its shadow on the ground. The shadow places the object on its surface and shows its height; it is kept, not lit away.
- FRONT UP — the side to be photographed
- ITS SHADOW — kept, and on the board
- INSIDE THE MARKERS — so all four can be read
- ✕ ACROSS A MARKER — the scale cannot be read
- ✕ SHADOW OFF THE EDGE — it cannot be put back
3. Photograph the colour card
At the start of each sitting, photograph the ColorChecker where the object will lie, in the same light. The PHOTARCH app reads the card and corrects every photograph of the sitting from it, so that colour means the same thing from one sitting to the next. If the light changes, it is a new sitting: photograph the card again.
- THE CARD — where the object will lie, at the start of the sitting
- THEN THE OBJECT — one correction from the card serves every frame
- THE LIGHT MOVED — a new sitting: the card again, before the object
4. Expose for the object
Photograph in raw, in the camera's deepest raw mode, at its lowest native ISO.
A camera's light meter does not know what it is looking at. It takes the scene as a whole to be middle grey and sets the exposure so that what it sees comes out that grey. Middle grey looks halfway between black and white, but it is not halfway in light: it reflects about 18 % of the light that falls on it, between two and three stops less than white. A stop is the photographer's measure of light: one stop more is twice the light, one stop less is half, so two stops less is a quarter and three stops an eighth.
Middle grey belongs to exposure, and to the time of film. A meter measures how much light comes back from a scene, not what the scene is, so it was set to an average: the light and the dark parts of an ordinary scene were taken to even out at about middle grey. For more certainty, a photographer metered a grey card held where the subject was, or measured the light falling on the subject with a hand-held meter, which comes to the same thing. With film that was sensible. Nothing could be seen until the film was developed, and negative film forgave a good deal of overexposure, so a scene placed around the middle was the safe choice. A spot meter could already read a single tone on the object — Ansel Adams's Zone System was built on that — but it took skill, and a calculation for every picture.
A digital camera changes this. Its sensor records light in proportion, up to a hard ceiling where it clips, and the picture can be seen at once. The highlight warning and the zebra read the picture itself, so the exposure can be set from what is actually in front of the lens, not from an assumption about it.
On a white ground the meter's assumption goes wrong: the meter sees mostly white, takes it down to grey, and the object goes down with it, about two stops too dark. On a grey ground the meter comes closer, since the ground does come out grey, but it leaves the top of the file unused and the object lower in it than it need be: underexposed, with fewer tonal steps and more noise once it is brightened — see Bit depth. The exposure is for the object, not for the ground.
On a white ground, the white shows where that exposure lies. Expose so that the white sits just under the point where it clips: the camera's highlight warning, or the zebra in PHOTARCH for iPhone, shows where that is. The PHOTARCH app measures the exposure on the object alone; the background is left out.
Focus by hand, on the object's outline: the outline is what is measured. Stop down to around f/8–f/11 and no further: past that, on most cameras, diffraction softens more than the extra depth gains. A deep object will not be sharp from front to back in one frame — the Venus below is 47.7 mm high, and at f/8 about 4 mm of her is in focus — so check the outline, and then the highest point, on the screen. The depth and the reasons are worked through under Choosing a lens.
- ✕ THREE STOPS UNDER — a grey ground; the top of the file unused
- ✓ JUST UNDER CLIPPING — white, with every bit in use
- ✕ CLIPPED — zebra on the ground: detail gone
- f/2.8 — 1.3 mm in focus: a line round her
- f/8 — 3.8 mm: most of her outline sharp
- f/22 — 10.6 mm, but diffraction softens all of it
5. The plumb view, then the other sides
The first picture is the plumb view: straight down onto the object as it lies on the ground. It is the main picture, the one the archive shows first and measures from.
F, the plumb view, is the one picture every object must have. Everything else is a bonus. More angles are good — they show the back, the thickness and the profile — but they add to the plumb view; they never stand in for it. An object without F has no picture that can be measured and laid beside another.
Photograph in the camera's own frame, 3:2 or 4:3; the picture is delivered square, so frame with room for one: the object in the middle, its longest side no more than about half of the frame's short side, and less for a high object, whose shadow needs room. Framed to fill the long side, a long object does not fit in the square. Why square, and why 60 % (75 % for a slender object), is under Framing.
Then photograph the sides that are documented. An object lying on the board has two faces, like a coin, two ends and two sides: Front is the plumb view, the face that lies uppermost, and Back the face it rests on; Top is the end at the top of the plumb view and Down the end at its bottom; Left and Right are the sides at the left and the right of the plumb view. ATL, ATR, ADL and ADR — A as in angle — are the four diagonals, looking down at 45° at the corner where an end meets a side.
For each view the object lies flat and the camera moves: straight above for Front, and for Back once the object is turned over; level with the board at 12, 6, 9 and 3 for Top, Down, Left and Right; and 45° down from 1:30 or 7:30 for the diagonals. For ATL and ADR the object is turned a quarter, so that the camera keeps clear of the lamp at 10:30 and of its reflection at 4:30. The lamp stays.
Front is the main picture, the one every other object is compared with, and the one to set exactly. The other views are less sensitive: they may even be taken on another ground, if there is a reason.
- THE LAMP — fixed at 10:30, 45° up
- CARD — where it will lie
- F — straight above
- B — turned over, above
- T — level, at 12
- D — level, at 6
- L — level, at 9
- R — level, at 3
- ATL — quarter turn, 1:30
- ATR — 45° down from 1:30
- ADL — 45° down from 7:30
- ADR — quarter turn, 7:30
6. Set the scale
Measure the object's longest side with the digital caliper and enter it: that is the scale of the object itself. Measure its depth too — how high it stands as it lies — and enter it as its thickness: the error margin of the scale depends on it, and the plumb view does not show it (why). With the board in the picture, the PHOTARCH app also finds the markers, works out how many millimetres one pixel covers on the board's surface and corrects the perspective in the same operation. A ruler laid beside the object is only a fallback: a measurement read off a ruler is a measurement of the ruler, and the measurement taken with the caliper is the one that holds for the object. The scale is written into the file as Image Scale Metadata, so that the picture can be measured wherever it goes. What a ruler can and cannot tell you is under Scale in artefact photography.
- THE MARKERS ARE FOUND — all four, as the camera saw them
- SQUARE, IN MILLIMETRES — the distance between them is known
- WITHOUT A BOARD — 100.00 mm ÷ 2,336 px = 0.0428 mm/px
7. Check the grade, then export
Before a picture leaves, the PHOTARCH app says what it is fit for — a record shot, a study or a reproduction — from what it measures: the scale, the resolution at the object, how much of the object is in focus and how much of it is clipped, colour against the card, the bits the camera recorded and the format. What each level asks is in the manual. For paintings, documents and other flat originals, FADGI, ISO 19264-1 and Metamorfoze can be turned on as well.
Crop to the square: the object always in its middle, its longest side 60 % of the square's side (75 % for a slender object, at least 1.5 times as long as it is wide), and the square larger where the shadow would otherwise leave the safe zone: outside that circle the picture is white. The crop leaves the scale and the measurements as they were. Export the master as a TIFF in Adobe RGB, at the depth the picture was photographed in, and a JPEG as the access copy. Every file carries its record, its rights and its scale; with a licence, it also carries signed Content Credentials. The master is never rewritten.
8. Describe it
A picture without a record is a picture of something unknown. Fill in what the object is, its inventory number, material, period and where it was found — a find spot can be withheld from publication — and choose the licence. When an object is published, the archive gives it a persistent identifier. What the fields are, and which standards they map to, is under Metadata.
Mistakes that cost the most
- Moving the lamp between views. The same view name no longer means the same light, and the comparison is lost.
- A fill light as strong as the key light, or a light tent. Light of the same strength from more than one side flattens the object; one key light gives it its form.
- Cotton gloves. They shed fibres, and the fibres show.
- A ruler as the only scale. It measures the ruler's own plane; a few millimetres of height change the result.
- A grey or coloured ground for some objects and white for others. Two grounds make two collections that cannot be laid side by side.
- Leaving the exposure to the meter. The white goes grey and the object darker with it; the top of the file goes unused, and the correction lifts the noise.
- Keeping only a JPEG. Eight bits, compressed: fine for access, not as the master.